Creating high-quality videos has never been easier with CapCut’s free desktop video editor. Whether you are a beginner or an experienced content creator, CapCut offers powerful yet easy-to-use tools to edit videos like a pro. This guide will help you make stunning videos using CapCut’s free editing tools.
Why Choose CapCut for Video Editing?
CapCut is a popular free video editing software offering a range of free professional features. Unlike other expensive editors, CapCut provides access to powerful tools such as multi-layer editing, keyframe animation, auto-captions, and advanced color grading at no cost. Additionally, its user-friendly interface makes it easy for anyone to edit videos efficiently.
Getting Started with CapCut Desktop
Before editing, you need to download and install CapCut on your computer.
Step 1: Download and Install CapCut
Visit the official CapCut website, download the desktop version, and follow the installation instructions to set up the software on your PC or Mac.
Open CapCut and create a new project. Once installed, you can explore its features and edit your videos.
Importing Media Files
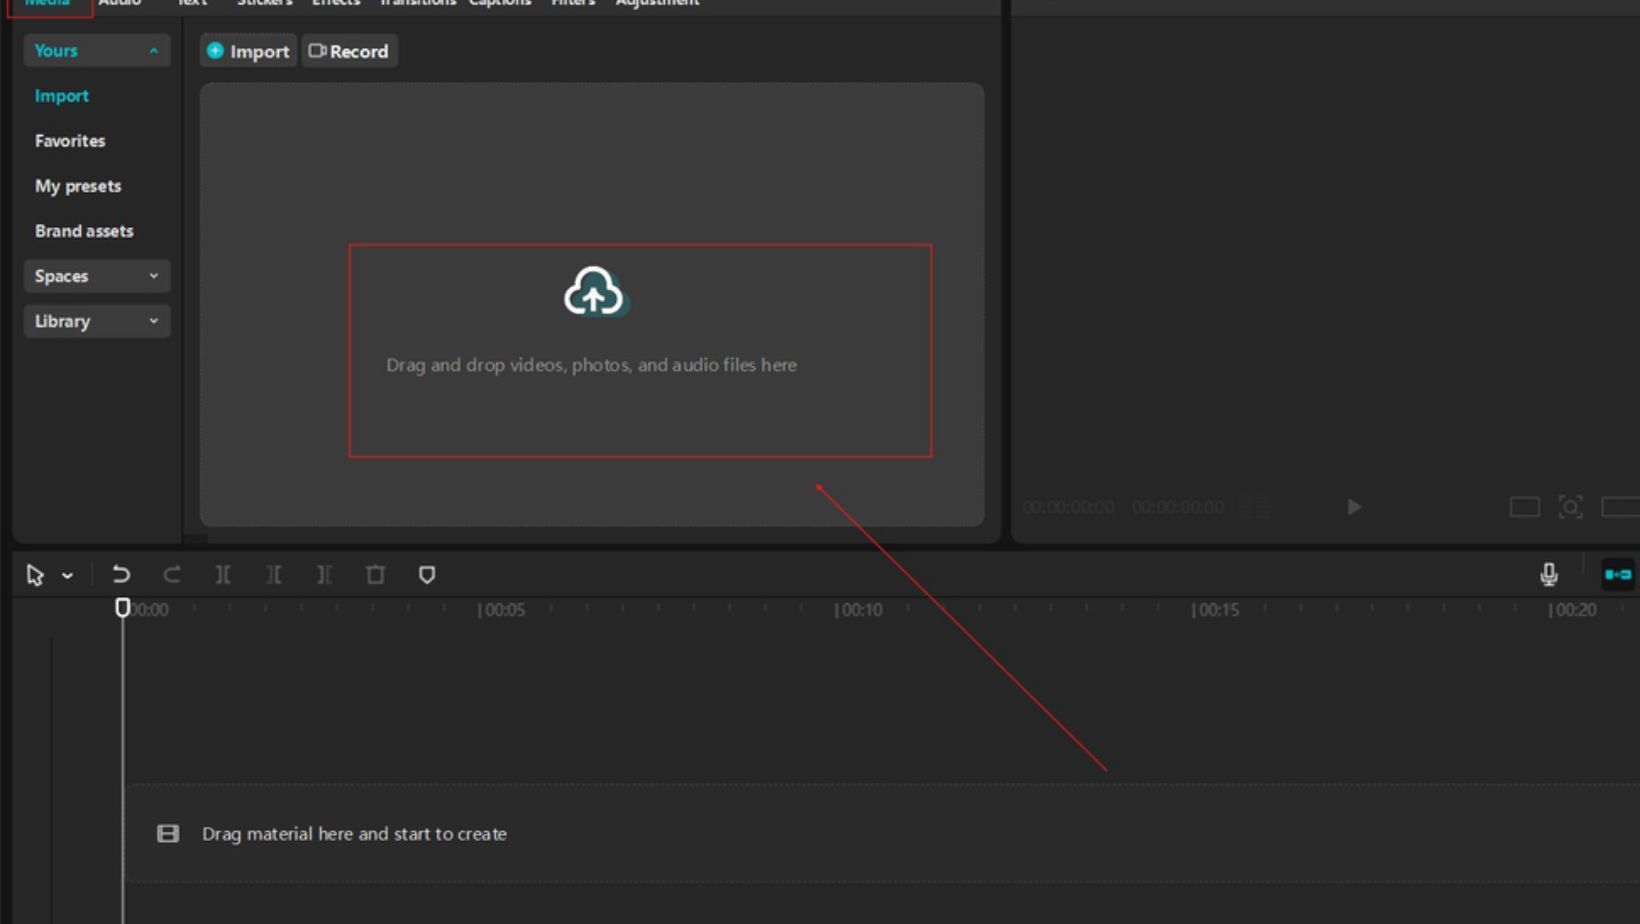
After opening CapCut, the first step in editing is importing your media files.
Step 2: Add Your Files
- To add your files, click the “Import” button to add videos, images, and audio files. Drag and drop your files into the timeline to start editing.
- Arrange your clips in the desired order to create a smooth flow.
Editing Your Video
Now that your files are in place, you can edit your video with CapCut’s free tools. You can create incredible videos by using CapCut AI Video Generator.
Step 3: Trim and Cut Clips
- Use the split tool to cut unnecessary parts from your video.
- Drag the edges of the clips to trim them and adjust the duration.
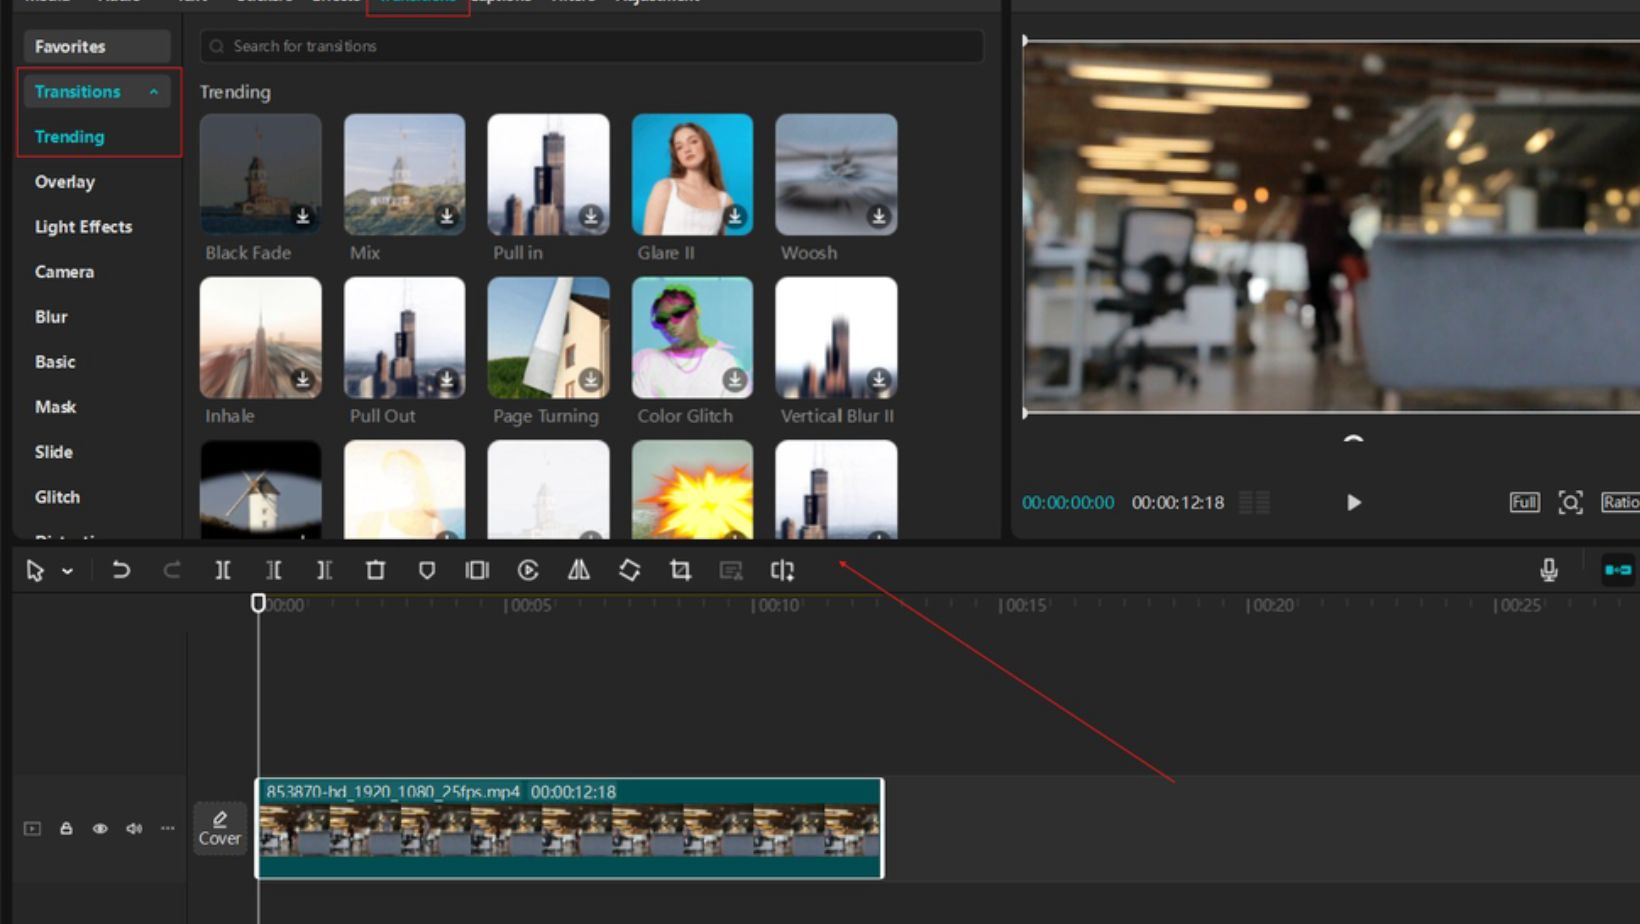
Step 4: Add Transitions
- Click on the “Transitions” tab and choose from various effects like fade-in, fade-out, slide, or zoom.
- Drag and drop the transition between clips for a smooth changeover.
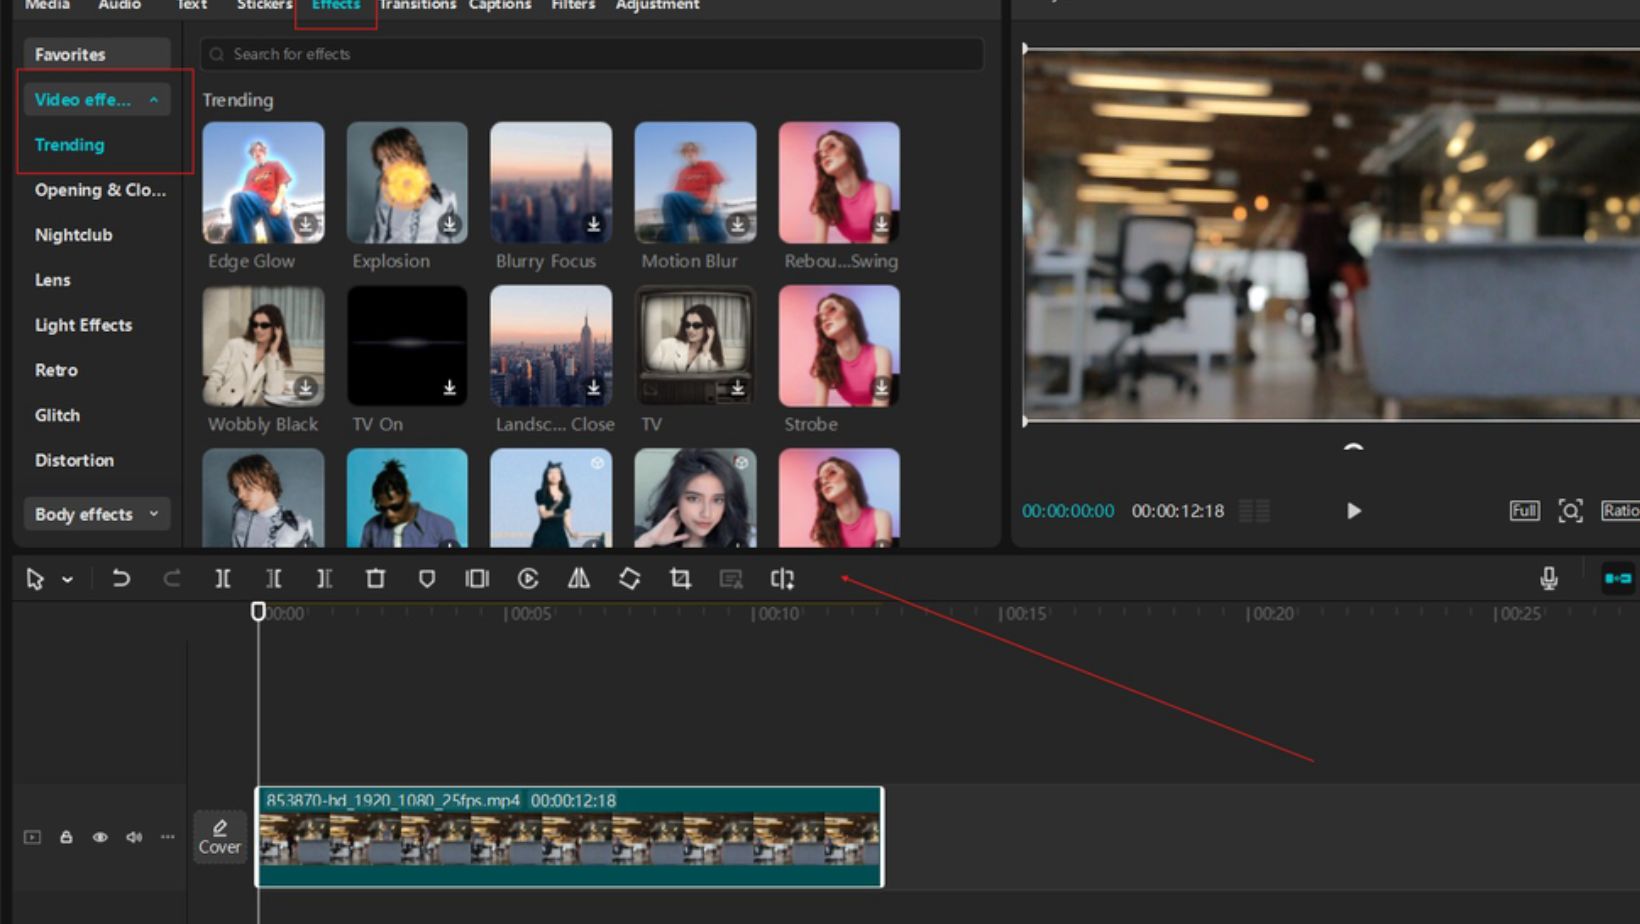
Step 5: Apply Filters and Effects
- Go to the “Effects” section to enhance your video with incredible visual effects.
- Use filters to adjust colors and give your video a professional look.
- Experiment with glitch, blur, or cinematic effects to add creativity.
Enhancing Video with Text and Stickers
Adding text and stickers makes your video more engaging and informative.
Step 6: Add Text Overlays
- Click on the “Text” tool, choose a template, type your text, and customize the font, size, and color.
- Adjust the position and duration to sync with your video.
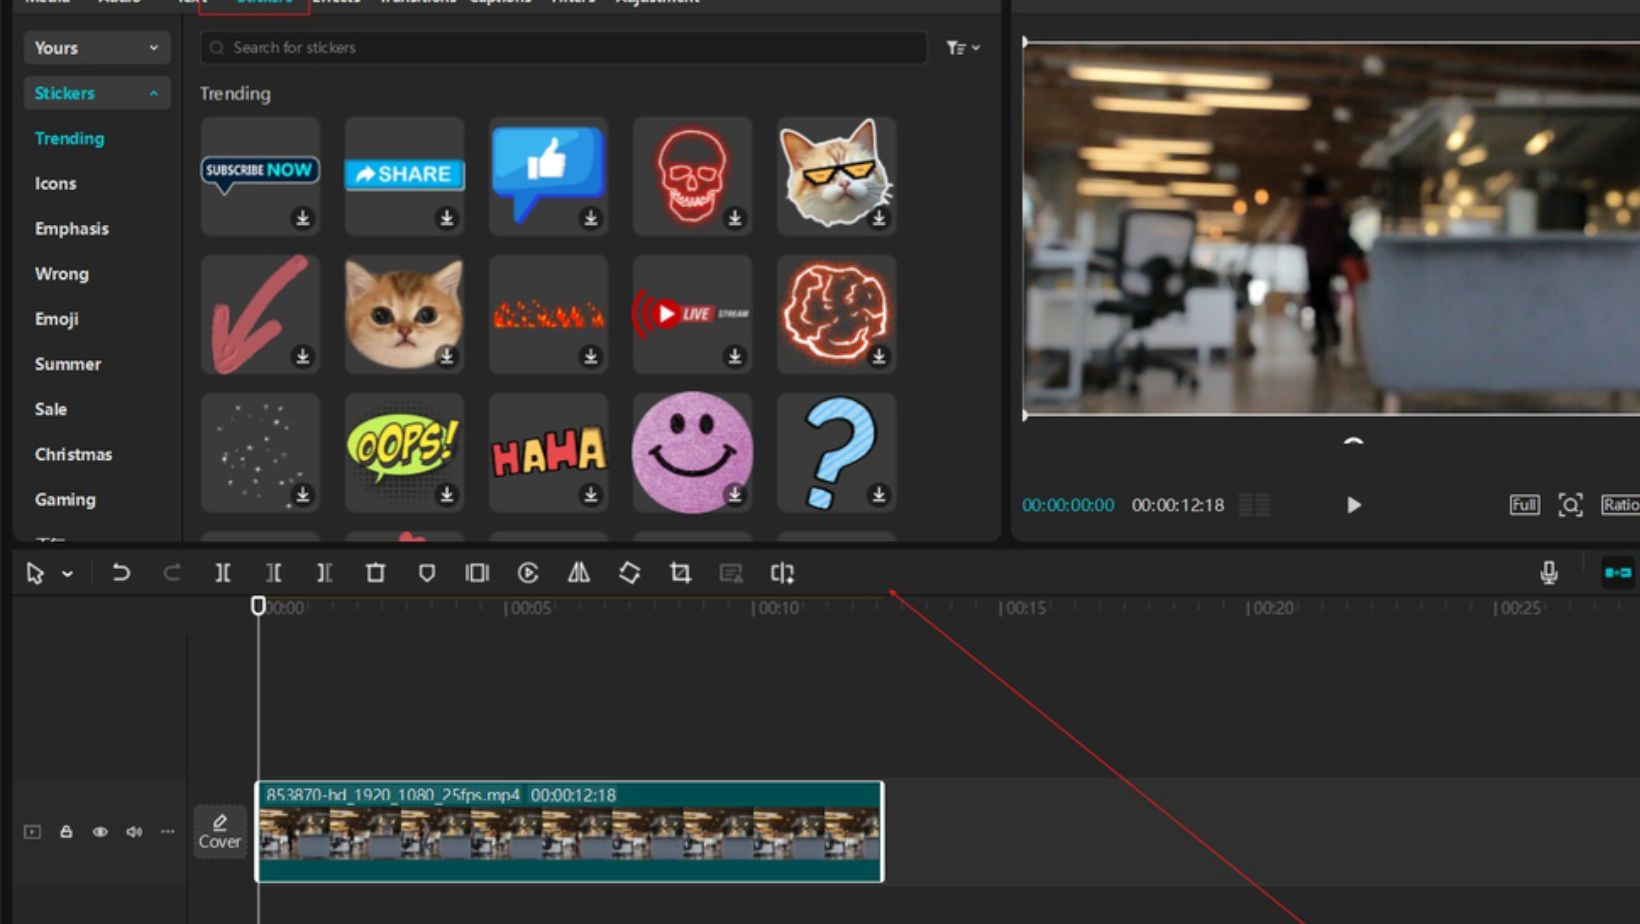
Step 7: Use Stickers and Emojis
- Browse the “Stickers” section and add animated elements to your video.
- Resize and position the stickers to make them blend naturally with your content.
Adding Background Music and Sound Effects
Music and sound effects help make videos more engaging.
Step 8: Import and Edit Audio
- Go to the “Audio” tab and choose from CapCut’s free music library.
- Import your music if you prefer a personalized touch.
- Adjust the volume, fade-in, and fade-out effects for a balanced audio experience.
Step 9: Add Sound Effects
- Browse sound effects like applause, nature sounds, or cinematic booms.
- Align sound effects with specific scenes for a dramatic impact.
Advanced Editing Features
CapCut also offers advanced tools for professional editing.
Step 10: Use Keyframe Animation
- If you want to add stunning animations to your videos, click on the “Animation” tool to add motion effects.
- Use keyframes to create a smooth movement for text, images, or videos. You can add text to speech using the Text to Speech AI feature.
Step 11: Color Grading and Adjustments
- Open the “Color” section to adjust brightness, contrast, saturation, and temperature.
- Use LUTs (color grading presets) for a cinematic feel.
Step 12: Remove Background with AI Tools
- If your video has a distracting background, use CapCut’s background remover to isolate subjects.
- This tool works best for portraits and product videos.
Adding Captions and Subtitles
Subtitles help improve accessibility and engagement.
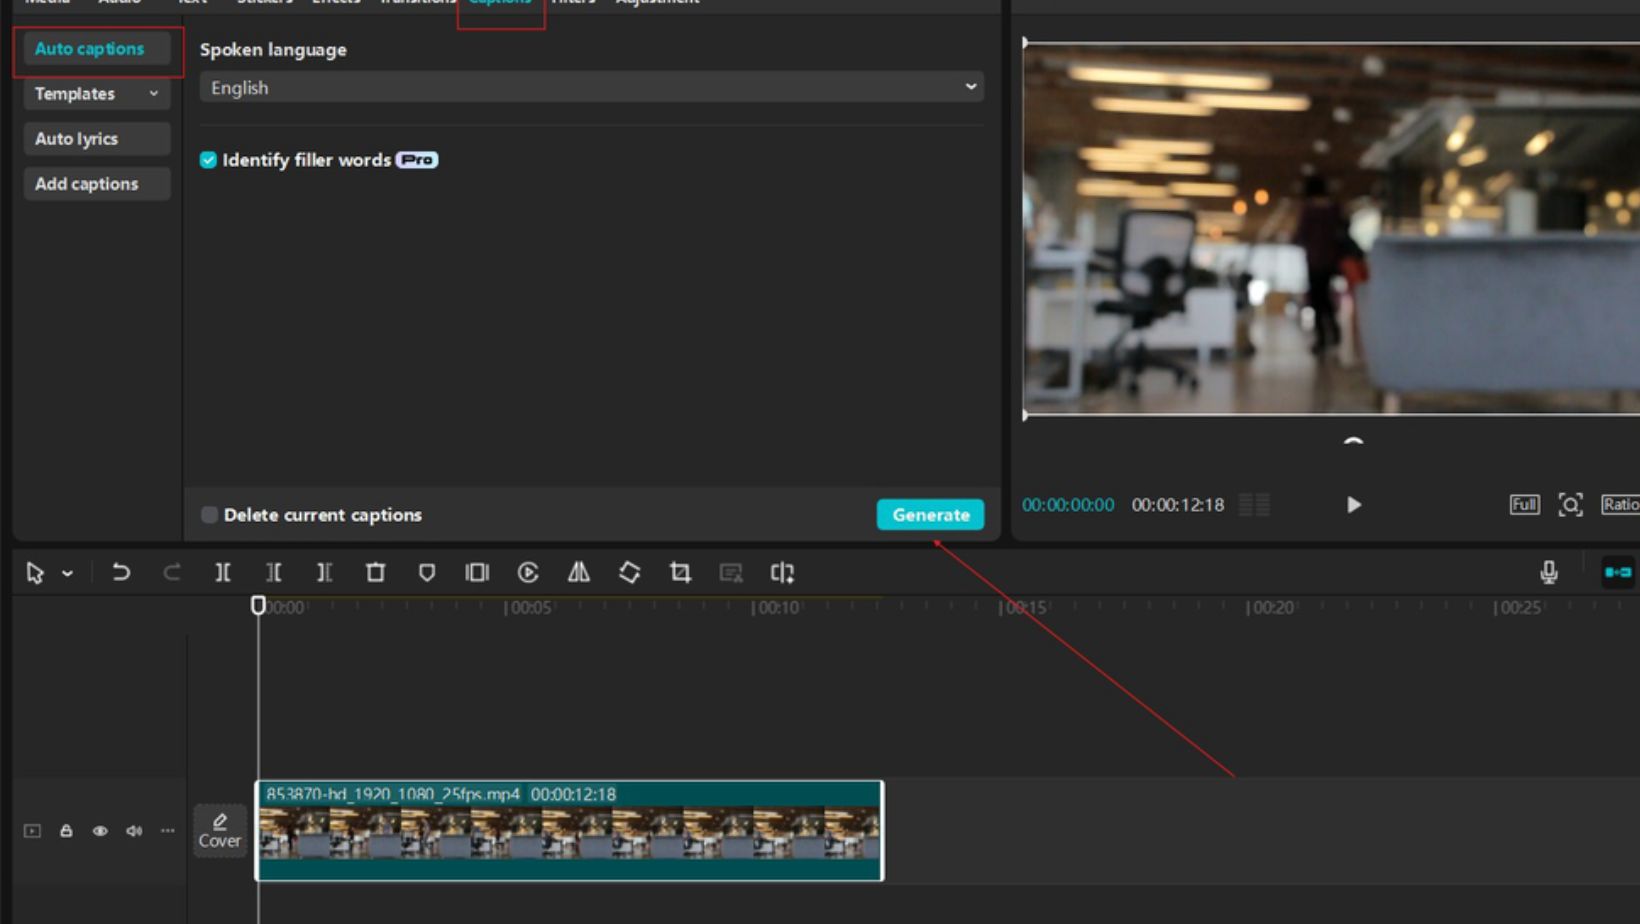
Step 13: Auto-Generate Captions
If you want to add captions to your video, hit the “Auto Captions” button and let CapCut generate subtitles for it. Edit and fine-tune the text for accuracy. Customize the font and style to match your video theme.
Exporting Your High-Quality Video
After editing, it’s time to save and export your video.
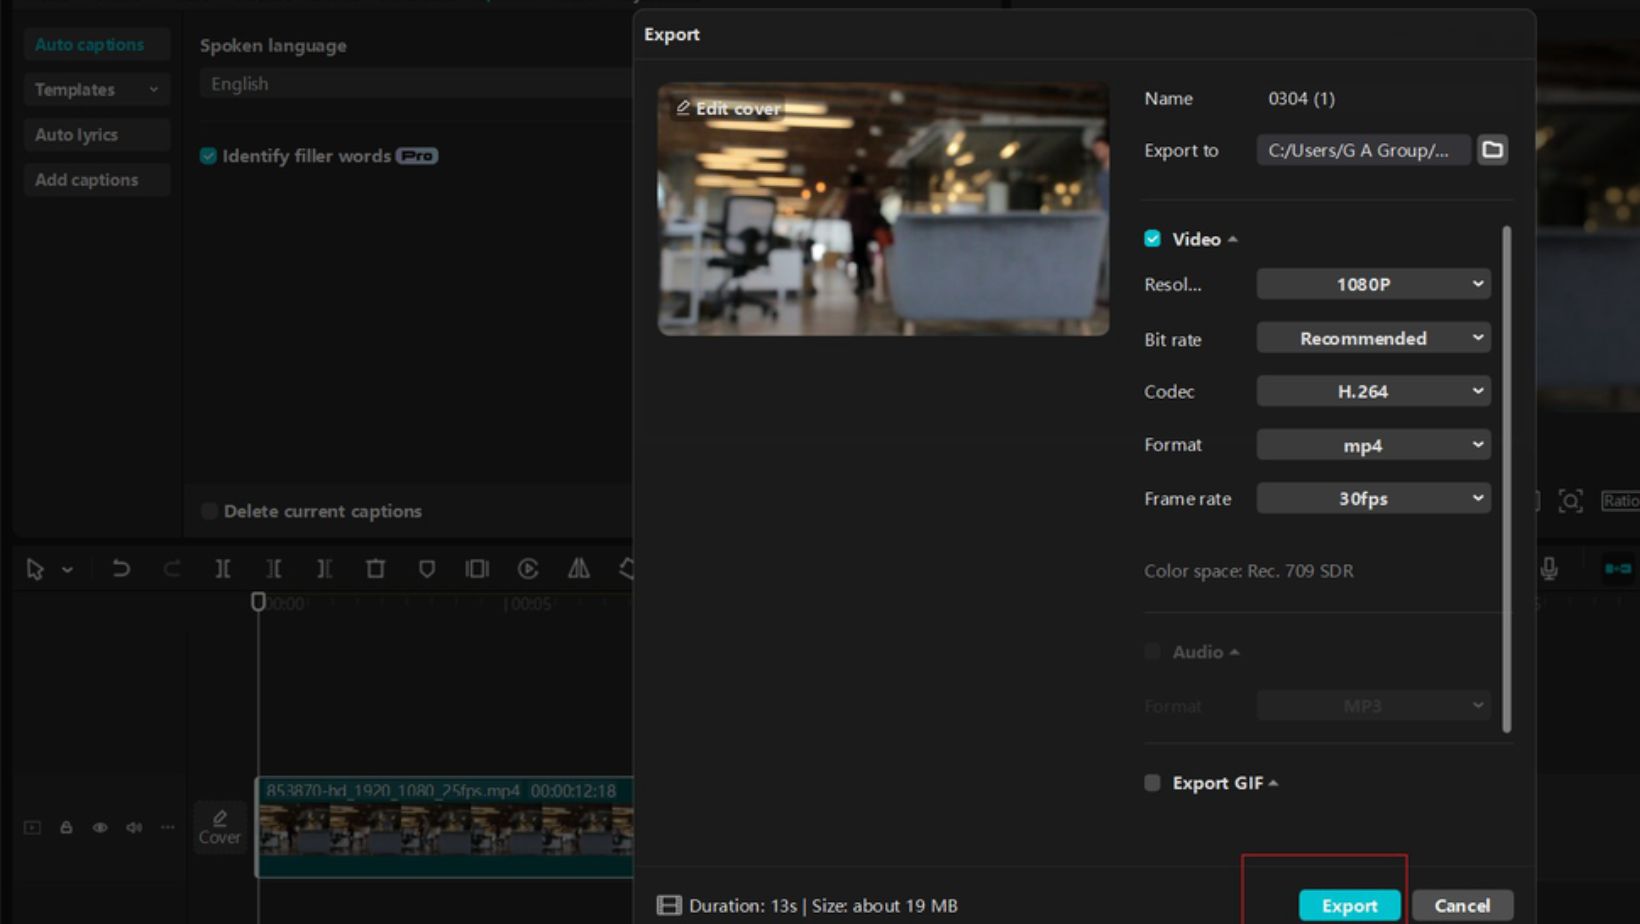
Step 14: Export Settings
Click the “Export” button. Choose the video quality (720p, 1080p, or 4K). Select the frame rate (30fps or 60fps) for smoother playback. Click “Export” to save the final video to your computer.
Final Tips for High-Quality Videos
- Use high-resolution footage for better video quality.
- Keep transitions smooth and natural.
- Balance audio levels to avoid sudden volume changes.
- Preview your video before exporting to check for errors.
Conclusion
CapCut Desktop Video Editor provides powerful free tools to create high-quality videos easily. Whether you want to make content for YouTube, social media, or personal projects, CapCut simplifies editing while offering professional features. By following these steps, you can create stunning videos effortlessly and take your video editing skills to the next level. Start exploring CapCut today and bring your creative ideas to life!